I really like this method of drawing a three-quarter back view of the human head.
I first started using this technique 1-2 years ago and don’t remember whether I saw it somewhere, was inspired by a diagram or illustration, or invented it myself. If you know where it’s from let me know. I also use it as a great artistic warm-up to raise my motivation and get positive vibes before a drawing session.
Here are some brief notes on the various steps:
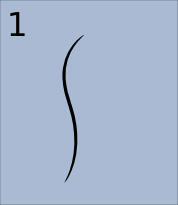
1. S shape, vertically stretched and quite subtle.
2. Each of the two horizontal curves cross the S curve about 1/3 closer to the left than right;
the higher new curve crosses the S shape at the S shape’s leftmost point (approximately);
the lower new curve crosses the S shape at the S shape’s rightmost point (approximately).
3. Sketch top and left part of a circle.
4. Add basic neck and shoulder lines.
5. Add the jaw line and the curve of the face to join the top part of the circle from the step 3. Arrows show recommended drawing directions.
You can partially erase the construction lines from steps 1 and 2. but these curves are still useful as they help show the form of the head and neck.
6. Added a C shape for the ear and a small horizontal line representing the chin edge – see inside of red dotted circle.
7. Erased a small notch for the eye socket and added suggestion of an eyelash.
8. Filled in the head area with basic skin color.
9. Dotted red line indicates the hairline for drawing in the hair later.
Did you find this technique useful? Post your comments below!
This entry was posted in Uncategorized. Bookmark the permalink. Both comments and trackbacks are currently closed.
How To Draw a Head Step by Step: Back 3/4 View
I really like this method of drawing a three-quarter back view of the human head.
I first started using this technique 1-2 years ago and don’t remember whether I saw it somewhere, was inspired by a diagram or illustration, or invented it myself. If you know where it’s from let me know. I also use it as a great artistic warm-up to raise my motivation and get positive vibes before a drawing session.
Here are some brief notes on the various steps:

1. S shape, vertically stretched and quite subtle.
2. Each of the two horizontal curves cross the S curve about 1/3 closer to the left than right;
the higher new curve crosses the S shape at the S shape’s leftmost point (approximately);
the lower new curve crosses the S shape at the S shape’s rightmost point (approximately).
3. Sketch top and left part of a circle.
4. Add basic neck and shoulder lines.
5. Add the jaw line and the curve of the face to join the top part of the circle from the step 3. Arrows show recommended drawing directions.
You can partially erase the construction lines from steps 1 and 2. but these curves are still useful as they help show the form of the head and neck.
6. Added a C shape for the ear and a small horizontal line representing the chin edge – see inside of red dotted circle.
7. Erased a small notch for the eye socket and added suggestion of an eyelash.
8. Filled in the head area with basic skin color.
9. Dotted red line indicates the hairline for drawing in the hair later.
Did you find this technique useful? Post your comments below!